数字时钟
[TOC]
本次作业的目标是使用 Timer 和 TimerTask 实现一个数字时钟应用程序。
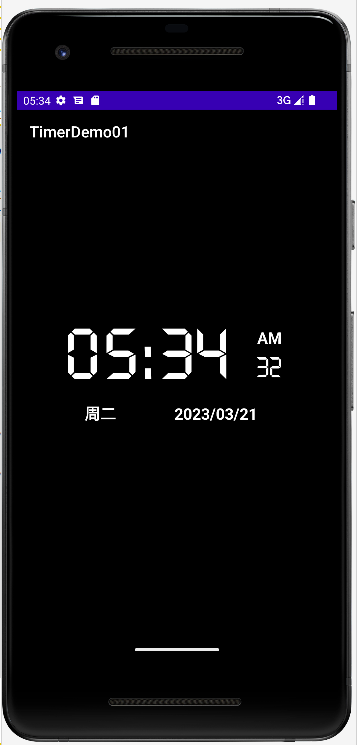
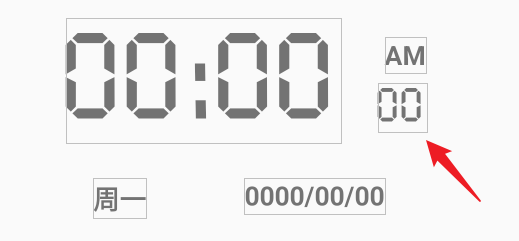
运行效果
功能需求
- 显示当前时间,包括 24 小时制时钟、上下午、秒数、日期和星期几。
- 实现数字时钟的刷新和更新,使其能够自动显示当前时间。
- 根据时间动态改变
实现思路:
1.布局设计
调整 ActionBar 的颜色

修改 ActionBar 颜色

在 themes.xml(night) 中增加 background 属性,以及设置黑夜字体为白色

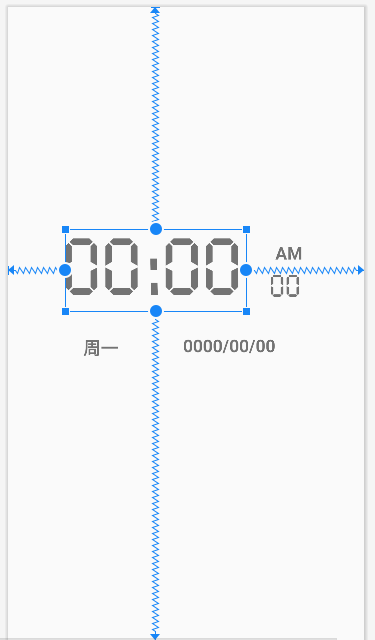
使用 ConstraintLayout 布局,包含 5 个 TextView 控件,分别用于显示当前时间、日期、星期几、上下午和秒数。
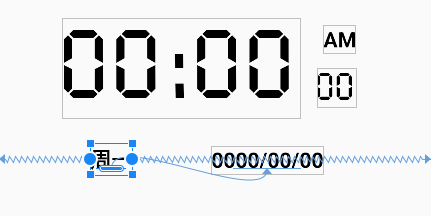
对 weekday_text_view 和 date_text_view 设置基线对齐
当前时间控件
1
2
3
4
5
6
7
8
9
10
11
12
13
14
| <TextView
android:id="@+id/time_text_view"
android:layout_width="wrap_content"
android:layout_height="wrap_content"
android:fontFamily="@font/digitalnormal"
android:letterSpacing="0.04"
android:text="00:00"
android:textSize="90sp"
app:layout_constraintBottom_toBottomOf="parent"
app:layout_constraintEnd_toEndOf="parent"
app:layout_constraintHorizontal_bias="0.326"
app:layout_constraintStart_toStartOf="parent"
app:layout_constraintTop_toTopOf="parent"
app:layout_constraintVertical_bias="0.402" />
|
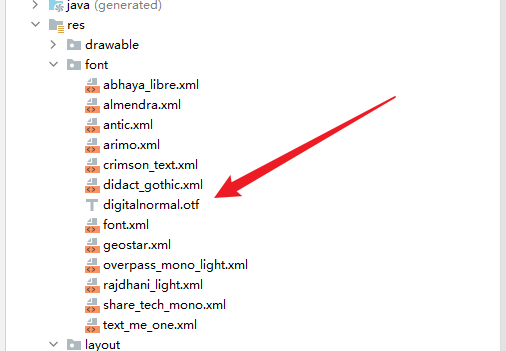
新建 Android Resource Directory 取名为 font 包,将电子数字字体下载后放置于 font 包中调用
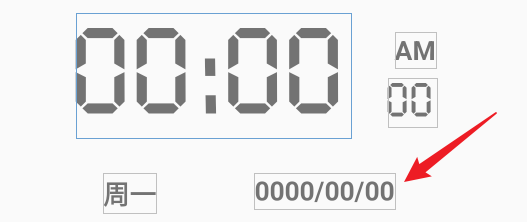
日期控件
1
2
3
4
5
6
7
8
9
10
11
12
13
| <TextView
android:id="@+id/date_text_view"
android:layout_width="wrap_content"
android:layout_height="wrap_content"
android:text="0000/00/00"
android:textSize="20sp"
android:textStyle="bold"
app:layout_constraintBottom_toBottomOf="parent"
app:layout_constraintEnd_toEndOf="parent"
app:layout_constraintHorizontal_bias="0.664"
app:layout_constraintStart_toStartOf="parent"
app:layout_constraintTop_toTopOf="parent"
app:layout_constraintVertical_bias="0.536" />
|
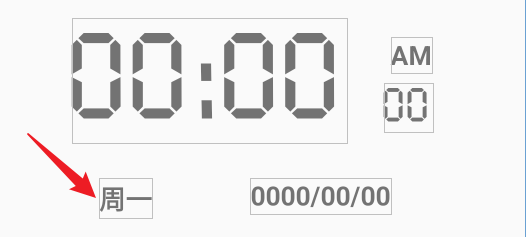
星期几控件
1
2
3
4
5
6
7
8
9
10
11
| <TextView
android:id="@+id/weekday_text_view"
android:layout_width="wrap_content"
android:layout_height="wrap_content"
android:text="周一"
android:textSize="20sp"
android:textStyle="bold"
app:layout_constraintBaseline_toBaselineOf="@+id/date_text_view"
app:layout_constraintEnd_toEndOf="parent"
app:layout_constraintHorizontal_bias="0.234"
app:layout_constraintStart_toStartOf="parent" />
|
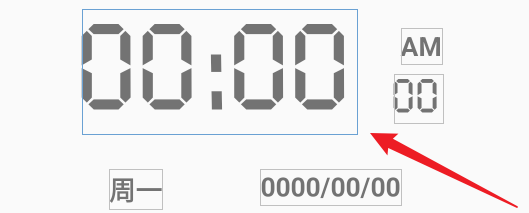
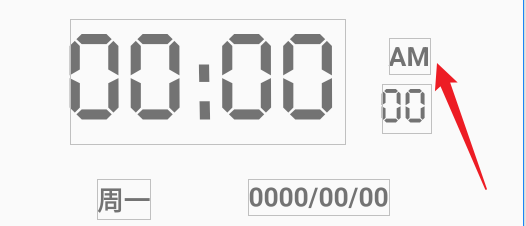
上下午控件
1
2
3
4
5
6
7
8
9
10
11
12
13
| <TextView
android:id="@+id/ap_text_view"
android:layout_width="wrap_content"
android:layout_height="wrap_content"
android:text="AM"
android:textSize="20sp"
android:textStyle="bold"
app:layout_constraintBottom_toBottomOf="parent"
app:layout_constraintEnd_toEndOf="parent"
app:layout_constraintHorizontal_bias="0.813"
app:layout_constraintStart_toStartOf="parent"
app:layout_constraintTop_toTopOf="parent"
app:layout_constraintVertical_bias="0.373" />
|
秒数控件
1
2
3
4
5
6
7
8
9
10
11
12
13
14
| <TextView
android:id="@+id/second_text_view"
android:layout_width="wrap_content"
android:layout_height="wrap_content"
android:fontFamily="@font/digitalnormal"
android:letterSpacing="0.01"
android:text="00"
android:textSize="35sp"
app:layout_constraintBottom_toBottomOf="parent"
app:layout_constraintEnd_toEndOf="@+id/ap_text_view"
app:layout_constraintHorizontal_bias="1.0"
app:layout_constraintStart_toStartOf="parent"
app:layout_constraintTop_toTopOf="parent"
app:layout_constraintVertical_bias="0.438" />
|
2.定时器设计
使用 Timer 和 TimerTask 实现定时器,定时器每隔 1 秒更新一次 TextView 的值,以实现时钟自动刷新的效果。
1
2
3
4
5
6
7
8
9
10
11
12
13
14
15
16
17
18
19
20
21
22
23
24
25
26
27
28
29
30
31
32
33
34
35
| private Timer timer;
TimerTask task;
public void init(){
TextView second_text_view = (TextView) findViewById( R.id.second_text_view );
TextView time_text_view = (TextView) findViewById( R.id.time_text_view );
TextView ap_text_view = (TextView) findViewById( R.id.ap_text_view );
TextView date_text_view = (TextView) findViewById( R.id.date_text_view );
TextView weekday_text_view = (TextView) findViewById( R.id.weekday_text_view );
timer = new Timer();
task = new TimerTask() {
@Override
public void run() {
runOnUiThread(new Runnable() {
@Override
public void run() {
...
}
});
}
};
}
@Override
protected void onCreate(Bundle savedInstanceState) {
super.onCreate(savedInstanceState);
setContentView(R.layout.activity_clock);
init();
timer.schedule(task, 0, 1000);
}
|
3.时间格式化
使用 SimpleDateFormat 类将当前时间格式化为需要的字符串,再设置到 TextView 控件上。
1
2
3
4
5
6
7
8
9
10
11
12
13
14
15
16
17
18
19
20
21
22
23
24
25
26
27
28
29
30
31
32
33
34
35
36
37
38
39
40
41
42
43
44
45
46
| @Override
public void run() {
Date now = new Date();
Calendar calendar = Calendar.getInstance();
calendar.setTime(now);
Locale englishLocale = Locale.ENGLISH;
SimpleDateFormat sdfTime = new SimpleDateFormat("hh:mm", Locale.getDefault());
SimpleDateFormat sdfTimeHour = new SimpleDateFormat("hh", Locale.getDefault());
SimpleDateFormat sdfDate = new SimpleDateFormat("yyyy/MM/dd", Locale.getDefault());
SimpleDateFormat sdfSeconds = new SimpleDateFormat("ss", Locale.getDefault());
SimpleDateFormat sdfWeekday = new SimpleDateFormat("EEEE", Locale.getDefault());
SimpleDateFormat sdfAmPm = new SimpleDateFormat("a", englishLocale);
String time = sdfTime.format(now);
int timeHour = Integer.parseInt(sdfTimeHour.format(now));
String date = sdfDate.format(now);
String seconds = sdfSeconds.format(now);
String weekday = sdfWeekday.format(now);
String amPm = sdfAmPm.format(now);
if ( 6 <= timeHour && timeHour <= 17 ) {
AppCompatDelegate.setDefaultNightMode(AppCompatDelegate.MODE_NIGHT_NO);
} else {
AppCompatDelegate.setDefaultNightMode(AppCompatDelegate.MODE_NIGHT_YES);
}
time_text_view.setText(time);
date_text_view.setText(date);
second_text_view.setText(seconds);
String formattedWeekday;
if (weekday.startsWith("星期")) {
formattedWeekday = weekday.replace("星期", "周");
} else {
formattedWeekday = weekday;
}
weekday_text_view.setText(formattedWeekday);
ap_text_view.setText(amPm);
}
|
4.多语言支持
由于时钟需要支持多语言,特别是上下午的显示,为了确保语言的准确性,需要将 SimpleDateFormat 中的语言设置为硬编码。
获取当前系统语言
1
| SimpleDateFormat sdfTime = new SimpleDateFormat("hh:mm", Locale.getDefault());
|
自定义的区域语言
1
| Locale englishLocale = Locale.ENGLISH;
|
实现细节
1.初始化时钟
在 onCreate() 方法中调用 init() 方法,该方法主要用于初始化 TextView 控件和定时器。
2.定时器
在定时器中,每秒更新一次时间和日期的字符串,并使用 runOnUiThread() 方法在主线程中更新 UI。
1
2
3
4
5
6
7
8
9
10
11
12
13
| task = new TimerTask() {
@Override
public void run() {
runOnUiThread(new Runnable() {
@Override
public void run() {
}
});
}
};
|
3.多语言支持
在 SimpleDateFormat 构造函数中,使用 Locale.getDefault() 获取当前系统语言,并将 SimpleDateFormat 中的语言设置为该语言。
1
2
3
4
5
6
7
8
9
|
Locale englishLocale = Locale.ENGLISH;
SimpleDateFormat sdfTime = new SimpleDateFormat("hh:mm", Locale.getDefault());
SimpleDateFormat sdfTimeHour = new SimpleDateFormat("hh", Locale.getDefault());
SimpleDateFormat sdfDate = new SimpleDateFormat("yyyy/MM/dd", Locale.getDefault());
SimpleDateFormat sdfSeconds = new SimpleDateFormat("ss", Locale.getDefault());
SimpleDateFormat sdfWeekday = new SimpleDateFormat("EEEE", Locale.getDefault());
SimpleDateFormat sdfAmPm = new SimpleDateFormat("a", englishLocale);
|
4.星期几的转换
在将星期几显示到 TextView 控件中之前,需要先将“星期X”转换为“周X”,使用 String 的 replace() 方法进行替换。
1
2
3
4
5
6
7
8
|
String formattedWeekday;
if (weekday.startsWith("星期")) {
formattedWeekday = weekday.replace("星期", "周");
} else {
formattedWeekday = weekday;
}
weekday_text_view.setText(formattedWeekday);
|
5.根据当前时间自动切换主题
获取当前时间,如果在 6:00-17:00 间则设置白天主题,否则设置为夜间主题
1
2
3
4
5
| if ( 6 <= timeHour && timeHour <= 17 ) {
AppCompatDelegate.setDefaultNightMode(AppCompatDelegate.MODE_NIGHT_NO);
} else {
AppCompatDelegate.setDefaultNightMode(AppCompatDelegate.MODE_NIGHT_YES);
}
|
代码分析
1.布局文件
activity_clock.xml:
使用 ConstraintLayout 布局,包含 5 个 TextView 控件,分别用于显示当前时间、日期、星期几、上下午和秒数。其中,上下午的控件使用了硬编码的方式来确保多语言的准确性。
2.Java 代码
ClockActivity.java:
该类主要实现时钟的逻辑和更新。在 onCreate() 方法中,初始化 TextView 控件和定时器,定时器每隔 1 秒更新一次时间和日期,并使用 runOnUiThread() 方法在主线程中更新 UI。同时,在 init() 方法中,使用 SimpleDateFormat 将当前时间格式化为需要的字符串,再设置到 TextView 控件上。在星期几的显示上,使用 String 的 replace() 方法进行替换,将“星期X”转换为“周X”。获取当前时间,如果在 6:00-17:00 间则设置白天主题,否则设置为夜间主题。
总结
本次作业中,我们使用 Timer 和 TimerTask 实现了一个数字时钟应用程序。通过使用 SimpleDateFormat 将时间格式化为需要的字符串,再设置到 TextView 控件上,并使用定时器每隔 1 秒更新一次时间和日期,实现了时钟自动刷新的效果。同时,我们还学习了如何在多语言环境下正确地显示上下午,并使用硬编码来实现语言设置,将上下午转化为 AM/PM 输出,以及通过获取当前的时间来动态更改主题。